Last week, one of our VMware ESXi servers stoped working.At first, I noticed that my password was not working.
I put the server into the rescue mode and booted it into RescueCd.
After mounting VMFS partitions, I saw that vmdk files were renamed to vmdk.babyk, and at that moment, I knew why my password not working —
I was hacked! Link to heading
Alongside the babyk files, there was a file named “How To Restore Your Files.txt”:
Your encrypted ID:
55b5b4d9-97fe-43dc-a105-b0bd15e00cd4

Please pay 100,000$ in Monero to the following account:
-----------------------------------------
88PaUKVy7YaRbhyw1spSoF402QgH98z589juZAkQCskX9sncUCSVhCCZMb7J5grAdmPyi5WvH1Ub73xXTKzM7e3G9p8ESd4
-----------------------------------------

Please contact the email address below within 3 days and pay the ransom.
Note: If you do not receive an email in your inbox during communication, please check whether it is in spam.
-----------------------------------------
[email protected]
-----------------------------------------

Warning: Please do not attempt to decrypt privately or make any changes to the server, otherwise we will no longer be responsible for the losses caused by this incidence
So now it’s obvious that my data is encrypted, and the only way to restore it was to pay $100,000.
I had 2TB plus 2 x 12TiB HDDs on this server, but there was just one thing among my data that I cared about.
There was a 12TiB disk on which I was running a SeaweedFS instance.
I used RDM to connect that physical disk to my virtual machine for better performance.
Immediately, I began negotiations with the hacker, but there was no luck. He demanded $100,000, which I couldn’t afford.
After being disappointed by the hacker, I began to research about the ransomware. After the first search I came across a vmware.com page with a good information about it.
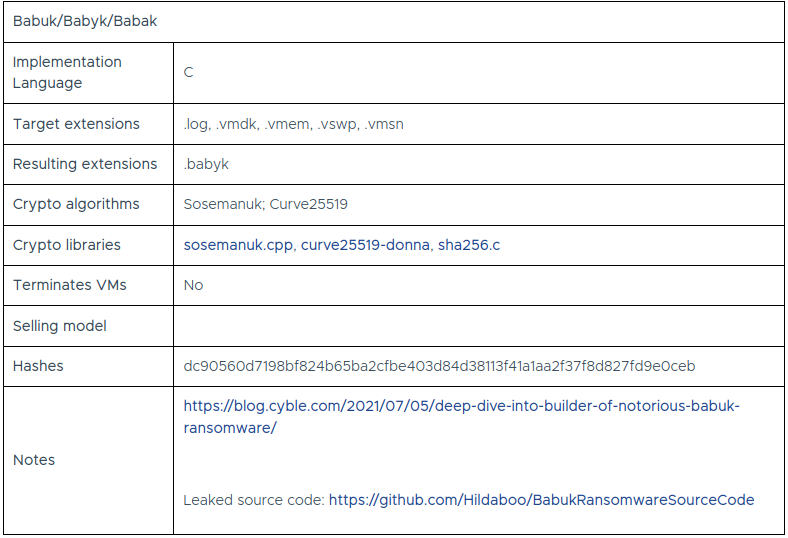
It turns out its name is Babuk, and its source code is leaked. Suddenly, some light of hope begins to shine!
In that Github repository, I found ext/dec/main.cpp.
So basiclly, it has two functions:
- void find_files_recursive(char* begin)
- void decrypt_file(char *path)
The names are self-explanatory.
I don’t care about find_files_recursive, and obviously, all of the decrypting is done by decrypt_file.
So, it reads 32 bytes at the end of the encrypted file, and using the m_priv global variable and curve25519 algorithm, a shared key will be created.
With that shared key, decrypting was easy; I could get my files back!
void decrypt_file(char* path) {
  ...
  FILE *fp_key = fopen(path, "r+b")
  if(fseek(fp_key, -32, SEEK_END) == 0) {
    fread(u_publ, 1, 32, fp_key);
    curve25519_donna(u_secr, m_priv, u_publ);
  }
  fclose(fp_key);
  truncate64(path, fstat.st_size - 32);
  FILE *fp = fopen(path, "r+b")
  if(uint8_t* f_data = (uint8_t*)malloc(CONST_BLOCK)) {
    do {
      wholeReaded += readed = fread(f_data, 1, CONST_BLOCK, fp);
      if(readed) {
        sosemanuk_encrypt(&rc, f_data, f_data, readed);
        fseek(fp, -readed, SEEK_CUR);
        fwrite(f_data, 1, readed, fp);
      } else break;
    } while(wholeReaded < 0x20000000 && wholeReaded < (fstat.st_size - 32));
  }
  ...
}
I had already heard about Curve25519 but never really used it. I searched and read about it. Even in those moments of losing 12TiB of data, I enjoyed the algorithm..
X25519 Link to heading
Here is the summary:
Mr. evil hacker creates a private key for himself from a random stream like /dev/urandom and saves it into the hacker_private variable. After that, he calls curve25519_donna() with that private key and generates a public key, saving it into the hacker_public variable.
When Mr. evil hacker attacks my server, for each file he follows these steps:
- He creates a private key using a random stream as the name,
file_private. - He passes that private key to
Curve25519and generates a public key,file_public. - Using curve25519 with his
hacker_publicandfile_privatecreates a shared key namedfile_shared. - Instantly, he erases
file_privatefrom memory. - He encrypts the file using the
file_sharedkey. - He appends
file_publicat the end of the file to persist it.
After receiving his ransom payment, the evil hacker provides you with an executable file containing his hacker_private key. This file follows these steps to decrypt your files:
- It reads 32 bytes from the end of the file and puts it into the
file_publicvariable, then truncates those bytes from your file. - Using
hacker_privateandfile_public, it createsfile_shared. - It decrypts your file.
In that moment of excitement, suddenly I felt hopeless because I needed Mr. evil’s private key to decrypt my files, and he wasn’t cooperative!
Hours later, when I showed the Babuk encoder source code to my colleague, I saw a miracle.
I found a condition!
In this condition, the hacker limits his program to the first 500MB of the disk due to the large size of the VMDK files.

Immediately, I ran fdisk to see what was on my disk.
As I expected, there was no partition table. Such metadata is stored on top of the block storage, and when 500MB of your disk is encrypted, you cannot expect these things to work normally.
I still wasn’t sure about the ransomware. Maybe the hacker modified the source code and removed that condition or raised the limit to a point where my data was not recoverable.
So, in that rescue OS, I installed hexcurse and started to traverse 12TiB of binary data.
After a few moments of jebirush I found text and readable data!
It was a log file, part of Certbot.
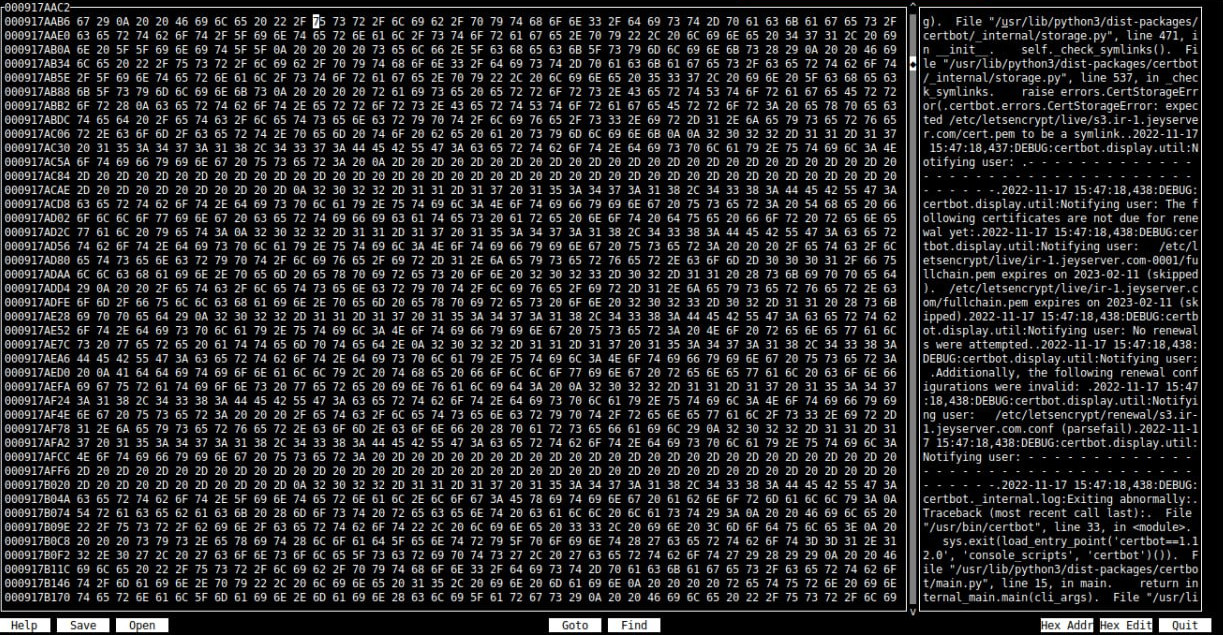
So now I was certain that a big part of my data was there, but there was no partition table, no filesystem.
I knew there were a lot of hours ahead trying to recover my data and sleepless nights, but I did what I should do.
Safety First Link to heading
So, before anything else, I scheduled a physical access time with the datacenter and headed there.
I detached both of my 12TiB HDDs and returned to the office.
Since these drives are in a 3.5-inch form factor, I turned to my very old friend, an HP desktop computer with 4 SATA 3 jacks and enough power supply for both of those drives.
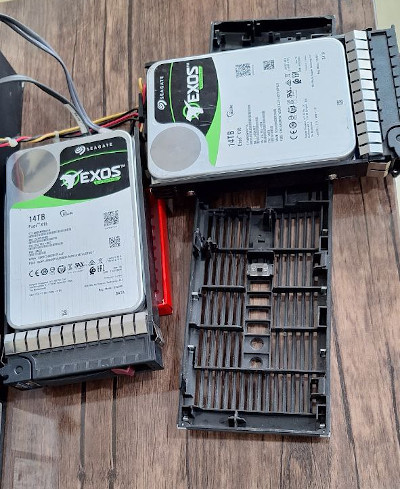
I downloaded and mounted the Debian 12 live ISO onto a USB stick and booted up the PC. Using dd, I backed up my important drive to another drive, AND IT TOOK 30 HOURS TO COMPELETE.
After that, I powered off the PC, disconnected the original disk, and booted Debian up again.
Partition Table Recovery Link to heading
First things first, I had to understand every level of storage to begin the process.
ESXi saves data to the disk (RDM) directly, but why when I access the VMFS volume, it has two files?
After a quick search, I noticed that for every virtual disk, ESXi creates a file descriptor containing some metadata about that virtual disk. Actually, the first VMDK is the descriptor. Mine was completely corrupted; its file size was less than 512MiB, and there was no way to restore it.
Based on the file size, the second file was a pointer to the physical drive.
But how does ESXi save the data in this RMDP file? Is there any custom layout?
With a quick search, I realized the answer is NO. If your .vmdk contains -rdm or -flat, your virtual disk is a raw image of the disk.
So, my backup drive is basically a broken drive that is missing the first 500MiB at the top, including the partition table.
Because I didn’t have any data about the count and location of partitions, I couldn’t just create a partition table using fdisk. If I had, it would have been much easier.
After spending some hours searching, I stumbled upon a utility named “testdisk”. This tool has a command to analyze the disk and find partitions using their filesystem fingerprint. Genius!
I began to analyze the backup disk, and after a few minutes, voilà! It found them!!
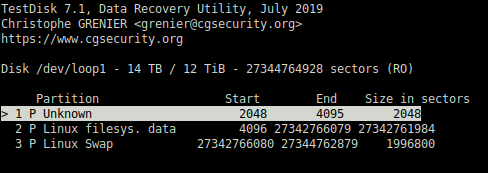
Ext4 Recovery Link to heading
So, I took a step forward, and now I had a partition table.
The first partition was the /boot filesystem with no important data.
You can always rebuild your /boot partition.
The third was a swap partition, and again, there was no need to worry about it.
But all my data was in the second one, and because some initial and critical parts of its filesystem were in the first 500MiB, it was damaged.
To be more specific, in the very first blocks of every ext4 filesystem, there are a few things named superblock, group descriptors, and bit masks. Basically, these blocks hold information about the whole other blocks, inodes, and data in the filesystem, like a map.
The good news is ext4 backs up these precious superblocks in multiple places in the partition so you can restore them if you lose the primary one.
The bad news is I didn’t have superblock backup locations. I mean, who does?!
Of course, you can calculate them if you have the “logical block size,” and again, I wasn’t sure!
You should know at this point my server was down for about 48 hours, and I didn’t have time to start over.
So, again, I went back to my new friend, “testdisk,” and it didn’t let me down. Using the “Superblock recovery” feature, I was able to locate all my superblock copies.
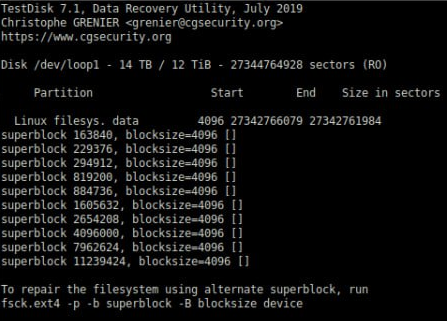
As you can see, testdisk suggested that by running fsck, you can begin to fix the filesystem using a superblock backup.
But it didn’t mention how much memory you will need to repair a 12TiB partition, and honestly, I never knew!
Every time I ran this command, after a few moments, it would be killed by the kernel for using too much memory.
I found an alternative: e2fsck
If you make a configuration file named /etc/e2fsck.conf and put a directory path for its temporary files, it will use less memory.
[scratch_files]
directory = /var/cache/e2fsck
Still, it needs 16 GiB of RAM, which my old PC neither has nor supports. Desperately, I made a very big swap partition.

And it took 24 LOOOONG hours to finish with no progress bar.
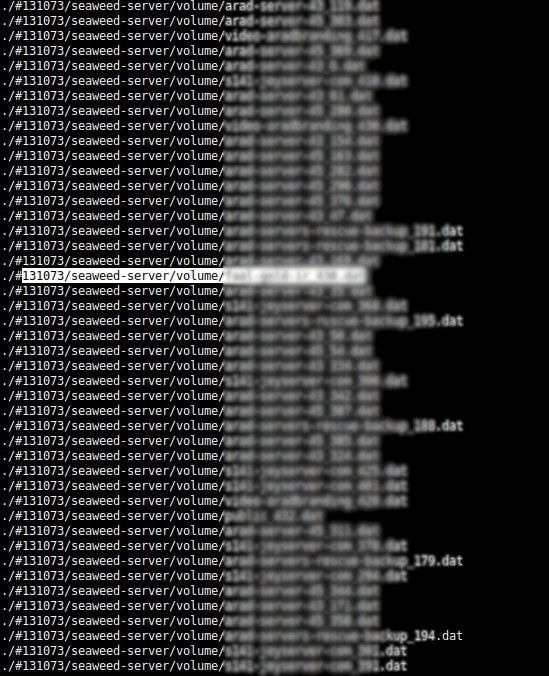
But in the end, it was worth days of hard work, and I was able to access my files. Easy Peasy!
So if you ever need my help with this nasty ransomware, please don’t hesitate to contact me.